So you want to embed a prototype into your website
Recently, we worked with our client Mobile Doorman to redesign their website. As part of the process, they asked us to embed a prototype of their app onto the homepage. This was a unique request for our team, but one that provided several of us with an exciting challenge to learn something new.
Create a mockup
We started by mocking up our design in Adobe XD. It’s a great prototyping tool because it's quick and efficient, and easy to learn.
 A screenshot of the Adobe XD file we created to build our Mobile Doorman prototype
It’s important to take your time when prototyping. It’s easy to jump the gun and leave out important hotspots (clickable areas that keep the prototype flow moving forward).
Take a few minutes, slow down a little, and ensure that every click on the prototype goes exactly where it needs to, otherwise your user could end up in a loop of screens that don't take them to the solution they’re looking for.
 The blue lines across the screenshot represent links from the homepage to other individual screens.
Use transitions to mimic app flow
Adobe XD also includes great features that allow you to add transitions between hotspots. This is an excellent way to refine the movement of your prototype and make it look like a more fully realized app.
In XD, you’re able to choose between a few types of transitions. You can do screen dissolves, push left / right and swipe left / right. However, don’t get too caught up in transitions. Your goal with a prototype is to make it feel as life-like as possible; if you use transitions that aren't available in the actual app, it can make the user feel misled.
Give it a final run-through, and then make it live!
After you’re done linking all your hotspots, give your prototype a test run to ensure everything is in working order. Now, it’s time to prep your prototype for its big debut.
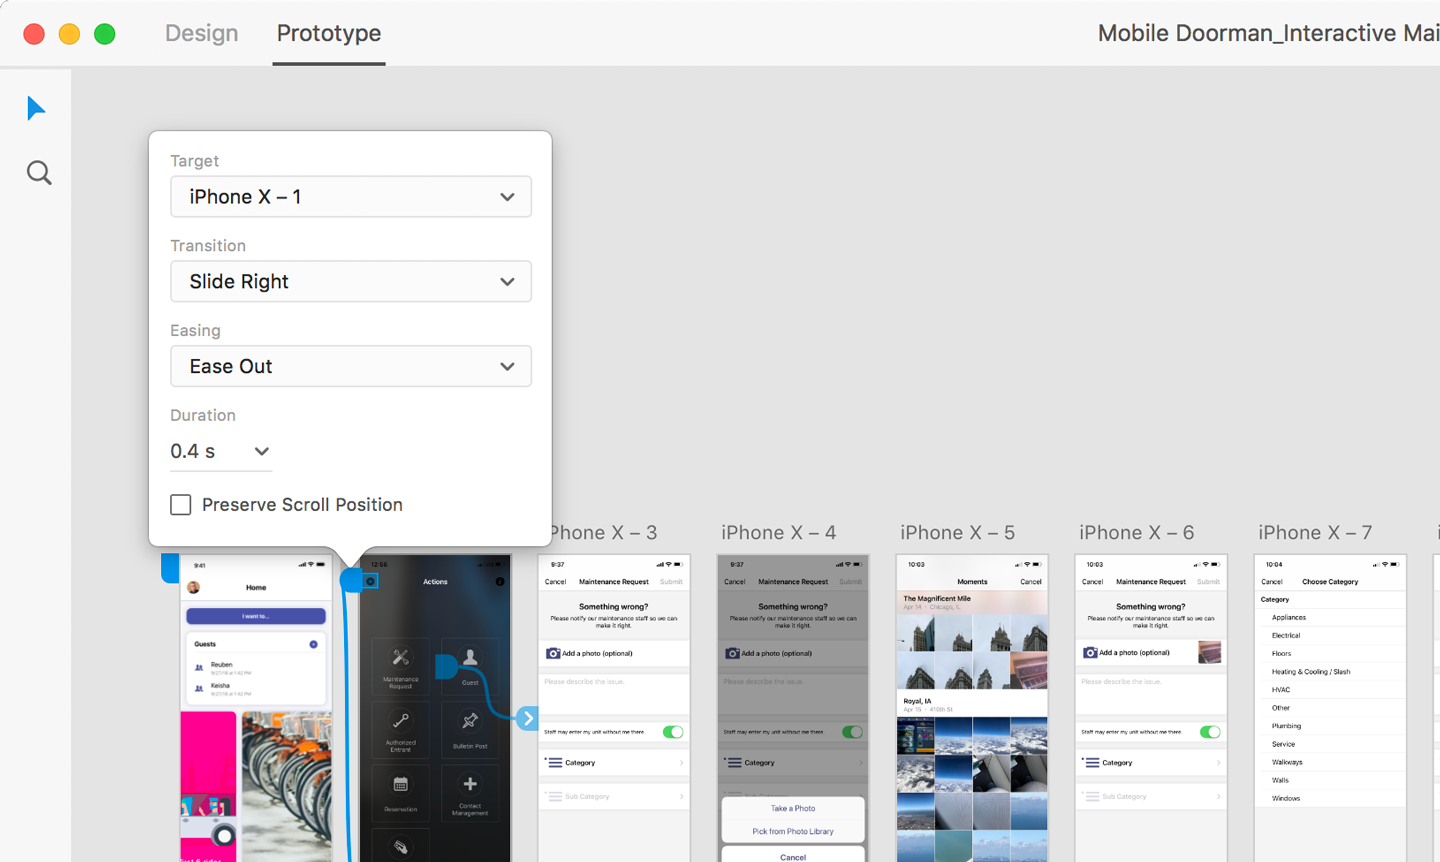 Adobe XD allows you to choose from several types of transitions and gives you additional options to make it as seamless as possible.
At the top right corner of your XD file, there’s a share icon (shown below). Give that bad boy a click, and then select the option “Publish Prototype.” Adobe allows you to title your prototype and gives more options to allow comments, open the prototype in full screen, or require a password to view it. For the sake of embedding this prototype into a website, the only thing you need to select is “Show Hotspot Hints”; this will help the users navigate the flow of the prototype better.
(Remember: they are viewing your prototype with a lot less context than you.)
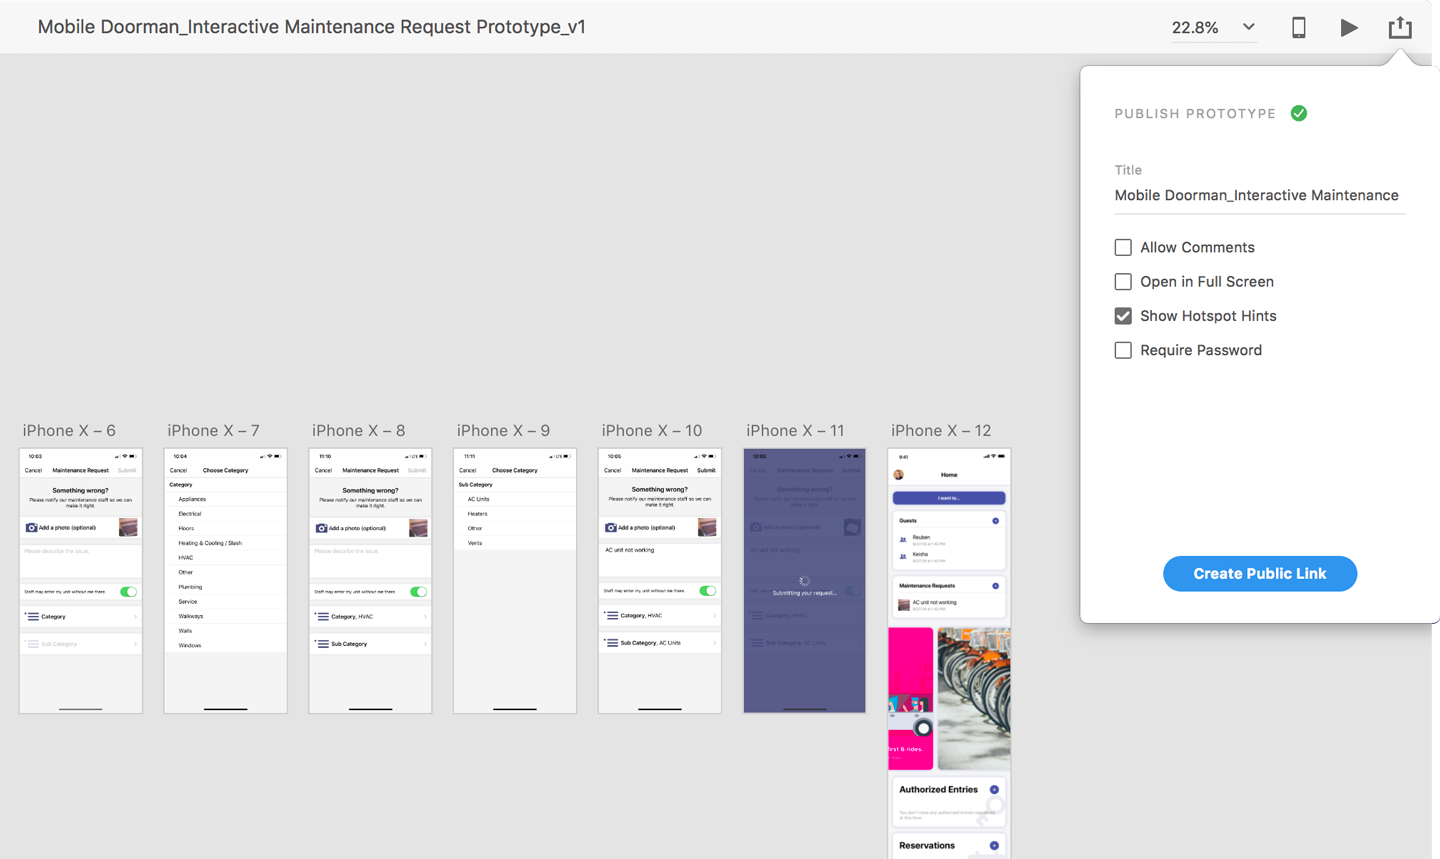 After selecting "Publish Prototype" under the share icon on Adobe XD, make sure to only enable the "Show Hotspot Hints" box.
Now that we’ve got all our presets figured out, go on and click “Create Public Link.” Adobe will magically generate a link for your prototype, which makes it live online. You can click on the ink to see the prototype directly on Adobe’s servers, but since we’re embedding the prototyping, we need to select “Copy Embed Code.” This option makes a neat iframe tag for your hyperlink, which allows it to be easily placed within the HTML document of any website.
From here, you need only position the prototype correctly on your website, and you’re done! Well, done-ish. You can take it a step further and place your prototype within a device mockup on your website too.
 Once a public link is created, select "Copy Embed Code" to get your prototype ready for embedding.
Gettin' fancy
We encountered a problem when first trying to place our prototype behind a device mockup. While we saved a .png of an iPhone frame with a transparent screen, it still did not allow us to click on the prototype. Our developer Hilary decided to break up the device image into four pieces: top, right, bottom and left. She positioned each part of the device mockup around the embedded prototype, and that finally allowed us to click on the hotspots.
In the end, it was a challenging yet fun process to learn how to embed this prototype. Now, go give it a try yourself and see what kind of magic you can make!